Sample Cisco Aironet 1132AG config

I found the Cisco Aironet 1132 AG web pages to be a pain. So here is a sample config for the people that are less familiar with the CLI, you can put the config in using your trusty console cable, or over SSH/telnet (do people still use telnet?). (Should you use SSH/telnet, beware that some settings may overwrite yours…)
(Can also be used on Aironet 1142, but do yourself a favor and also enable 802.11n there.)

!
! Last configuration change at 19:15:58 +0100 Sun May 21 2017 by cisco
! NVRAM config last updated at 19:16:49 +0100 Sun May 21 2017 by cisco
!
version 12.4
no service pad
service timestamps debug datetime msec
service timestamps log datetime msec
service password-encryption
!
hostname ap-1
!
logging rate-limit console 9
enable secret 5 $1$**********
!
no aaa new-model
clock timezone +0100 1
ip domain name lan
ip name-server 8.8.8.8
ip name-server 8.8.4.4
!
!
dot11 syslog
dot11 vlan-name default vlan 1
!
dot11 ssid My Netname
   authentication open 
   authentication key-management wpa version 2
   guest-mode
   wpa-psk ascii 7 0014*** No I don't think so ***5876103
!
dot11 arp-cache optional
!
!
username Cisco password 7 *******
!
!
bridge irb
!
!
interface Dot11Radio0
 no ip address
 no ip route-cache
 !
 encryption mode ciphers aes-ccm 
 !
 ssid My Netname
 !
 speed  basic-11.0 basic-12.0 basic-18.0 basic-24.0 basic-36.0 basic-48.0 basic-54.0
 station-role root access-point fallback shutdown
 no dot11 extension aironet
 no cdp enable
 bridge-group 1
 bridge-group 1 subscriber-loop-control
 bridge-group 1 block-unknown-source
 no bridge-group 1 source-learning
 no bridge-group 1 unicast-flooding
 bridge-group 1 spanning-disabled
!
interface Dot11Radio1
 no ip address
 no ip route-cache
 !
 encryption mode ciphers aes-ccm 
 !
 ssid My Netname
 !
 no dfs band block
 speed  basic-12.0 18.0 24.0 36.0 48.0 54.0
 channel dfs
 station-role root access-point fallback shutdown
 no dot11 extension aironet
 bridge-group 1
 bridge-group 1 subscriber-loop-control
 bridge-group 1 block-unknown-source
 no bridge-group 1 source-learning
 no bridge-group 1 unicast-flooding
 bridge-group 1 spanning-disabled
!
interface FastEthernet0
 no ip address
 no ip route-cache
 duplex auto
 speed auto
 bridge-group 1
 no bridge-group 1 source-learning
 bridge-group 1 spanning-disabled
!
interface BVI1
 ip address 192.168.0.24 255.255.255.0
 no ip route-cache
!
ip default-gateway 192.168.0.1
ip http server
no ip http secure-server
ip http help-path http://www.cisco.com/warp/public/779/smbiz/prodconfig/help/eag
bridge 1 route ip
!
!
!
line con 0
line vty 0 4
 login local
!
sntp server 85.93.88.43
sntp broadcast client
end

Beware of the ip addresses in the config!
The username/password is Cisco/Cisco .
Set your own WPA Password.
Only one SSID can be set, so you may encounter an error there if you double copy-paste or your own config is still in place.

Dot11Radio0 is 2.4Ghz
Dot11Radio1 is 5Ghz

As always, YMMV!

Cisco Aironet 1132 / 1142 LWAP to AP

Old Cisco Aironet access points make good testing equipment, or a good home/lab network. They can be picked up rather cheap from ebay, although the light-weight access point variant. This LWAP variant is programmed to work with a Cisco Wireless LAN Controller (WLC), but the WLC is a rather expensive piece of hardware. And I like to have more than one active AP, not dependent on one piece of network equipment, for redundancy.
Luckily the LWAP access points can be flashed to be Autonomous access points which can fully function on their own. (Without WLC, yay!)
As always, use at your own risk!

What do you need?

  • The correct IOS image.
  • A TFTP server.
  • A network cable.
  • A console cable (Classic Cisco roll-over).
  • An external power supply (these things can work using PoE, you know?)

I’ll leave it up to you to obtain the IOS image, you can find the correct filenames over at Cisco.com. I’ll be using my images in the example, so make sure to replace them.
Also be sure to check the MD5sum of the files before transferring the image!

A TFTP server (for Windows) can be found for free, for example:
http://tftp-server.sourceforge.net/

Even when installing a wireless access point, finding a network cable should not be a problem. I sure hope so…

A console cable may be an obstacle, as maybe not very body had these lying around. If you need to buy one, I personally prefer the light blue Cisco RJ45 – DB-09 cable. And if you don’t have a serial port on your computer, look immediately for an USB RS-232 serial cable.

You would be surprised if you are not familiar with these access points, but since they can be powered over Ethernet (and are powered that way in most deployments), they are mostly sold without power supply. So make sure you have one, you cannot perform this process using power over Ethernet.

Off we go!

Disconnect everything from the AP, connect your console cable, open your terminal and connect the power supply while holding the “mode” button pressed.
The access point should now boot to ROMMON, it’ll tell you to release the mode button.

If needed (space issues, or old data from previous owner), format the flash:

format flash:

Then enter the next commands:

ether_clear
ether_init
set IP_ADDR 192.168.1.50
set NETMASK 255.255.255.0
set DEFAULT_ROUTER 192.168.1.1
tftp_init

The access point will tell you when to connect the lan cable, by trying to activate the connection. In this example, the access point is directly connected to the Ethernet port of my computer, my computer is 192.168.1.60, the ap is configured as 192.168.1.50. The default router can really be anything in the same subnet as it will not be used, I’ve chosen 192.168.1.1 .

For Aironet 1140 series:

tar -xtract tftp://192.168.1.60/c1140-k9w7-tar.153-3.JD13.tar flash: 

For Aironet 1130 AG series:

tar -xtract tftp://192.168.3.40/c1130-k9w7-tar.124-25d.JA.tar flash:

Things that may get you in this step:

  • TFTP server not listening on the correct ip
  • AP not in the allowed-clients list
  • different firewall related issue
  • TFTP timeout to low

And last but not least, hold space-bar during the whole process!
For some reason the transfer always fails unless I hold space-bar, so get a paper-weight and put it on your keyboard, this is going to take a while.

To boot the new image, for Aironet 1140 series:

set boot flash:/c1140-k9w7-mx.153-3.JD13/c1140-k9w7-mx.153-3.JD13
boot flash:/c1140-k9w7-mx.153-3.JD13/c1140-k9w7-mx.153-3.JD13

For Aironet 1130 AG series:

set boot flash:/c1130-k9w7-mx.124-25d.JA/c1130-k9w7-mx.124-25d.JA
boot flash:/c1130-k9w7-mx.124-25d.JA/c1130-k9w7-mx.124-25d.JA

When booted, the first thing you should do is save a fresh config file:

en
write mem

Then set the boot image, for Aironet 1140 series:

conf t
boot system flash:/c1140-k9w7-mx.153-3.JD13/c1140-k9w7-mx.153-3.JD13
end
write mem

For Aironet 1130 AG series:

conf t
boot system flash:/c1130-k9w7-mx.124-25d.JA/c1130-k9w7-mx.124-25d.JA
end
write mem

If the access point asks for a username and password, just enter the default cisco / Cisco .

Have fun!

Cisco 881G2 3G configuration

So the other day my Internet went down, for a couple of days…
That’s when the idea came for a backup connection. But, to be honest, a backup connection is rather stupid for an internet connection that is actually quiet reliable.

Then I found out I couldn’t connect my garage to my network, WIFI was out of range, different options were considered (maybe more on that later) but found to slow and expensive for what I want to do with it (which is, not a lot at the moment).

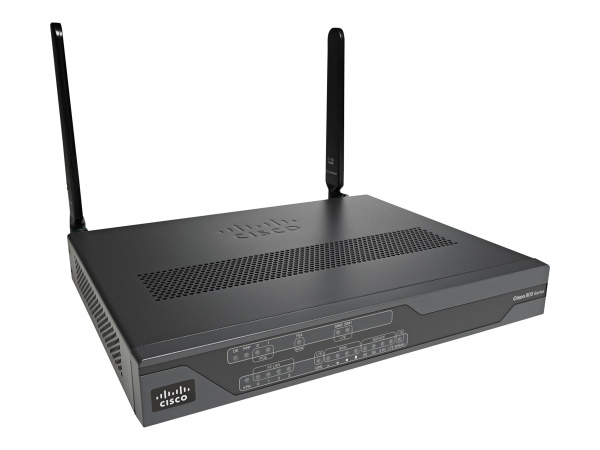
A couple of days later I stumbled across an ad from a seller I follow for a Cisco 881 with 3G modem, CISCO C881G+7-K9 WAN FE (non-US) 3.7G HSPA+ R7 w/ SMS/GPS (MC8705), as the ad named it. (Seems like they are now selling an older, cheaper model, damn me for checking…) Of course I couldn’t resist.

So I informed the wife I ordered some network-toys, which I would then use in our garage and that she wouldn’t have any trouble from it (after trying to install that loud as hell switch in the basement, I do add that part). Proceeded by ordering the cheapest pre-paid SIM I could find (Belgium is expensive when it comes to mobile Internet) and waited for my new toy to arrive.

The day that the router was delivered came, and my quest to get it online started. Unfortunately it took me longer than I had hoped, which is why I’m writing this post now.

On to the hardware, there seem to be different versions of this router. So, to make sure you can continue reading, these operations were performed on the following equipment:

Cisco IOS Software, C880 Software (C880DATA-UNIVERSALK9-M), Version 15.2(4)M4, RELEASE SOFTWARE (fc2)
...
ROM: System Bootstrap, Version 15.1(2r)T2, RELEASE SOFTWARE (fc1)
...
System image file is "flash:/c880data-universalk9-mz.152-4.M4.bin"
...
Cisco 881G2 (MPC8300) processor (revision 1.0) with 498688K/25600K bytes of memory.
Processor board ID FCZ174692HV

5 FastEthernet interfaces
1 terminal line
1 Virtual Private Network (VPN) Module
1 Cellular interface
256K bytes of non-volatile configuration memory.
125440K bytes of ATA CompactFlash (Read/Write)


License Info:

License UDI:

-------------------------------------------------
Device#   PID                   SN
-------------------------------------------------
*0        C881G+7-K9            ***


License Information for 'c880-data'
    License Level: advipservices   Type: Permanent
    Next reboot license Level: advipservices

Still here? Let’s move on to the cellular configuration!
First you need to configure the cellular modem with valid profile.
Here is my “show cellular 0 profile” output

Profile 1 = ACTIVE*
--------
PDP Type = IPv4
Access Point Name (APN) = web.be
Authentication = PAP
Username: web
Password: web

 * - Default profile

Configured default profile for active SIM 0 is profile 1.

I’ll leave tinkering in the CLI to you, I’m sure you’ll find the right commands to enter. They are not in configure mode, just in enable mode and here’s a small hint: “cellular 0 gsm profile ?”.
Oh, and maybe an idea, you can also remove the SIM’s pin code, which removes another hurdle when booting up. (“cellular 0 gsm sim ?”)
Please also note that my SIM is installed in slot 0, if yours is installed in a different slot, change your command accordingly.

Now, for the IOS configuration part:

Configure a chat script for the modem, mine looks like:

chat-script INTERNET "" "AT!SCACT=1,1" TIMEOUT 60 "OK"

If you desire, enable GPS:

controller Cellular 0
 gsm gps mode standalone
 gsm gps nmea
!

Configure your Cellular interface (this configuration includes “NAT outside”, you probably want NAT, and you may want to configure “ip nat inside” on the interface that connects your local network:

interface Cellular0
 ip address negotiated
 ip nat outside
 ip virtual-reassembly in
 encapsulation slip
 load-interval 60
 dialer in-band
 dialer idle-timeout 0
 dialer string INTERNET
 dialer-group 1
 async mode interactive
!

More NAT config, route and ACLs to allow traffic:

ip nat inside source list 1 interface Cellular0 overload
ip route 0.0.0.0 0.0.0.0 Cellular0
access-list 1 permit any
dialer-list 1 protocol ip permit

Modem configuration:

line 3
 exec-timeout 0 0
 script dialer INTERNET
 modem InOut
 no exec
 transport input all
 rxspeed 21600000
 txspeed 5760000
line 6
 modem InOut
 no exec
 transport input all
 transport output all
 stopbits 1
 speed 4800

That’s it, remember to “write mem” and reload to see if the configuration sticks.

Cisco 881