Xeon Phi in a desktop

So Intel Xeon Phi coprocessors have become relatively cheap these days. You can find a PCIe coprocessor for 100€ or less on eBay. But can this little gem be ran in an ordinary desktop? (Or should we start calling it a workstation now?)

Browsing the internet, you’ll find that the Xeon Phi a rather picky component to install in your computer. It seems to need expensive workstation or server grade hardware. But times have changed, hardware has evolved. Is this still true?
Doing some research you’ll inevitably stumble upon Puget Systems, and their various articles about the Xeon Phi. They are a great source of knowledge, these guys truly seem to know what they are doing. But the info is not really up to date.

The Phi requires a full size PCIe slot, however this slot can be an 8x slot. So a motherboard that supports dual gpu’s these days, could be sufficient. The Intel Xeon Phi PCIe coprocessor needs above 4G decoding to work, most motherboards have this feature nowadays (maybe a bios update is required). So the odds are looking good… time to get started.

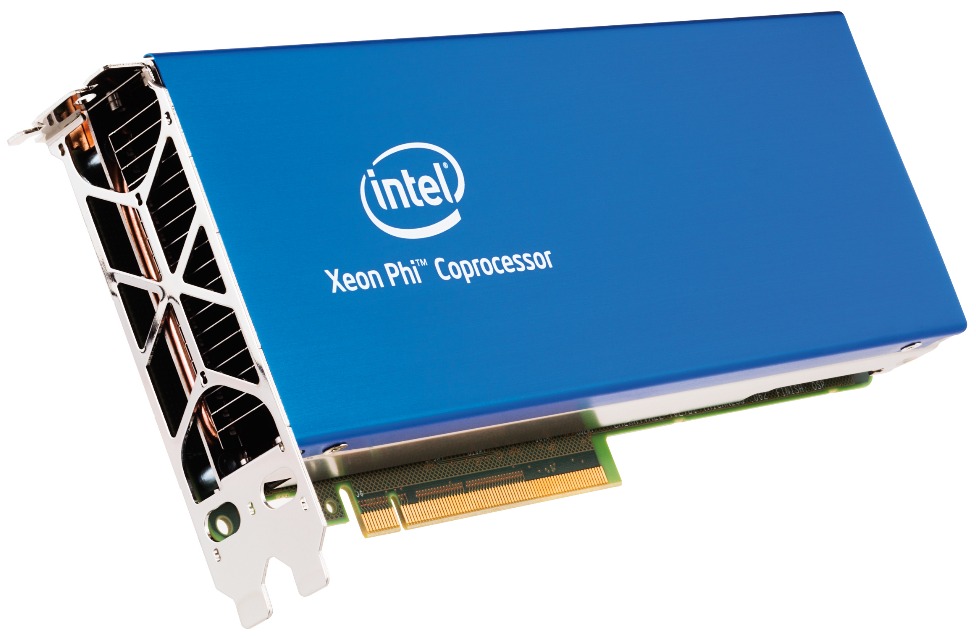
I got an old Intel Xeon Phi 5110P co-processor from eBay. Yup, the passively cooled version (why make it easy?). I then proceeded to order a 3D printed fan adapter and a powerful fan.
Next step was to fit it all in the case. To be honest, first time I had to cut out a part of the old trusty case, but the drive cage was in the way. This thing is lengthy with the fan mounted. (And it is heavy, a support has already been ordered.)
Do not try to boot without additional cooling, the card will overheat terribly fast, you won’t even get to see if it was working.
To be honest I kind of like the looks of the big blue card in my desktop, but it makes the computer sound like a jet engine. This had to be fixed, as my beloved wife was not pleased with the noise. In comes the old trusty fan controller, the fan speed has been lowered to 2000-2200 rpm, which makes it OK as far as noise goes. The Xeon Phi now idles at 70 degrees Celsius without touching it (acceptable to me).

So what components are in the desktop that was used?
Nothing fancy to be honest:

  • MSI X470 Gaming Pro (latest bios)
  • AMD Ryzen 5 2600X
  • 16GB RAM
  • AMD RX 570 GPU
  • Windows 10 Pro

So there you have it, an AMD CPU paired with an Intel Xeon Phi 5510, all while running Windows 10.
Hyper-V enable Nested Virtualization

Hyper-V supports nested virtualization, yes, even on Window 10.
How do you go about enabling this? The official documentation gives you a very good explanation:

https://docs.microsoft.com/en-us/virtualization/hyper-v-on-windows/user-guide/nested-virtualization

Want a quick summary instead? Throw the following commands in Powershell:

Set-VMProcessor -VMName <VMName> -ExposeVirtualizationExtensions $true
Get-VMNetworkAdapter -VMName <VMName> | Set-VMNetworkAdapter -MacAddressSpoofing On

This simply enables nested virtualization for your VM and fixes the networking (enables MAC address spoofing, so no NAT etc, just a bridge).

And disable dynamic RAM for your VM, it won’t work. The doc say so and it prevented my test VM to boot.

My take on Windows Storage Space Direct 2019

And how exactly went my take on Windows 2019 with Storage spaces direct?
Rough, kind of a love-hate relationship.

Let’s be clear this is a nice system for large, professional deployments, could do very good work when mixed with a Hyper-V cluster, or maybe an SMB share, but that’s about it.

So I managed to get a storage spaces direct cluster running on my thin clients, paired with USB devices. First of all, of course you need Active Directory. It’s Microsoft technology, no way around it I guess. So I ran Hyper-V on the thin clients to separate my Domain controllers from my S2D nodes.
Now, to manage S2D, you’d better be using Windows Admin Center. And don’t go quick an dirty by installing Windows Admin Center on your Hyper-V host (it’s a lab after all), won’t work! It returns some shady error about WinRM not being configured etc. It started working after I installed it in a fresh VM (shame on me for trying take short-cuts, run multiple service on one server…).
So after I got the abomination called Windows Admin Center running(which is actually a quite nice application, but I’m still a bit pissed about the lost time due to the connection error), I could finally manage the S2D cluster.

Bummer one, I have 3 S2D nodes and had a whole plan worked out using mirroring to protect data, turns out I could only use 3-way mirroring. Down goes the usable storage capacity.

Bummer two, S2D keeps a portion of storage “reserved” for repairs etc, when disks break. This is nice to have, but it was not in my planned calculations. I could not disable it, so once again, down goes the usable storage capacity…

Then, I did not plan to use it for backing Hyper-V, I actually was thinking about exporting iSCSI volumes from it (Windows has a built-in iSCSI target service after all). Turns out you can’t combine these two… (bummer three). I quickly figured I could deploy a VM in a high available hyper-v cluster, on my S2D storage, and share the iSCSI disks from there. It would probably work, but it would take this way to far… (I honestly don’t know how the thin clients would cope with nested virtualization).

That on top of the fact that I could use only about 33% of the raw capacity (I also couldn’t select parity raid), I kind of ditched the idea. So now I have my Windows lab idle again, waiting for a new experiment…

This is starting to look a bit like a rant… so how did Storage Spaces Direct feel?

Well, to be honest, at first I was impressed it even worked with the old devices I tossed at it! Performance was bad, but in line with what you could expect from old USB drives clustered together by a couple of thin clients. Kudos for that! I know that the version of ScaleIO I tested a couple of years ago wouldn’t have done it, that’s for sure.

As said at the start of this post, Storage Spaces Direct is a good, sturdy solution to host your Hyper-V VMs on, or maybe an SMB share throughout your domain. But do keep it in the Microsoft ecosystem. Prepare to get creative if you want to do other things with it. But it most certainly is a good tool to add to your toolbox.
Downside? The amount of raw storage it seems to need. But in return you get a serious highly available system.
(Just don’t deploy it at home on shabby hardware.)

As always, YMMV!

Windows 2019 Storage Spaces Direct on non certified hardware

So, quick update…

When you try to deploy Storage Spaces Direct on your Windows 2019 VMs or non-certified servers, you are presented with a nice red error in PowerShell:

Enable-ClusterS2D : Microsoft recommends deploying SDDC on WSSD [https://www.microsoft.com/en-us/cloud-platform/softwar
e-defined-datacenter] certified hardware offerings for production environments. The WSSD offerings will be pre-validate
d on Windows Server 2019 in the coming months. In the meantime, we are making the SDDC bits available early to Windows
Server 2019 Insiders to allow for testing and evaluation in preparation for WSSD certified hardware becoming available.
 Customers interested in upgrading existing WSSD environments to Windows Server 2019 should contact Microsoft for recom
mendations on how to proceed. Please call Microsoft support [https://support.microsoft.com/en-us/help/4051701/global-cu
stomer-service-phone-numbers].
    + CategoryInfo          : InvalidOperation: (MSCluster_StorageSpacesDirect:root/MSCLUSTER/...ageSpacesDirect) [Ena
   ble-ClusterStorageSpacesDirect], CimException
    + FullyQualifiedErrorId : HRESULT 0x80070032,Enable-ClusterStorageSpacesDirect

Enable-ClusterS2D : Failed to run CIM method EnableStorageSpacesDirect on the root/MSCLUSTER/MSCluster_StorageSpacesDir
ect CIM object.  The CIM method returned the following error code: 50
    + CategoryInfo          : InvalidResult: (MSCluster_StorageSpacesDirect:String) [Enable-ClusterStorageSpacesDirect
   ], CimJobException
    + FullyQualifiedErrorId : CimJob_EnableStorageSpacesDirect_50,Enable-ClusterStorageSpacesDirect

Thank you Microsoft, just want to make use of the feature that is part of the software I’m using…

So here is the registry key to get past this message and enable S2D on your non-certified server (only needed on the node where you are performing the installation):

New-ItemProperty "HKLM:\SYSTEM\CurrentControlSet\Services\ClusSvc\Parameters" -Name S2D -Value 1 -PropertyType DWORD -Force


Have Fun!
As always, no warranties provided, use with caution. (This is a lab, not production.)

VMware workstation + Hyper-V

Just a small announcement:

VMware workstation 15.5 is now compatible with Hyper-V of Windows 10 build 19041.264 (probably and up)!

Which means, to get it working you’ll have to update your windows to the latest patch level, which may not have been rolled out in your region yet. If so, the update assistant can be found here:

https://www.microsoft.com/en-us/software-download/windows10

The VMware workstation pro release can be downloaded at VMware and accepts your current Workstation pro license. It can be found here:

https://www.vmware.com/products/workstation-pro.html

Which means you can run Hyper-V, VMware Workstation and WSL2 on your Windows 10 desktop! (But you don’t want to see the pile of network adapters it created, I’m currently at 18 items in the network connections screen.)

And concerning WSL, you can convert your WSL1 distro to WSL2 and take all your work with you. Only thing that I’ve discovered to be broken was my X-forwarding setup, but that’s to be expected.

https://docs.microsoft.com/en-us/windows/wsl/install-win10#set-your-distribution-version-to-wsl-1-or-wsl-2